Tuesday, January 8, 2013

Quick Kitchen Update


Hello, back today with a quick kitchen update for you.  A few years ago, my style was more rustic and fit in with our country surroundings.  However, over the past 2 years I've gotten a little more daring and started to blend in more of the beach cottage vibe I am drawn to.  As part of this change in decorating taste, I've painted my living room and entry blue.  The half bath in the kitchen went gray along with the boy's toy room and interior of the front door.  With that, my burnt orange kitchen wasn't working anymore.


A couple weeks ago, I started researching the best colors for honey oak cabinets.  New cabinets aren't in the budget right now, but possibly refinishing them is.  With that in mind, I chose Sea Salt by Sherwin Williams around the cabinets.  And since the dining room area receives a ton of natural light, I went one shade darker with Comfort Gray.SW6205 Comfort Gray

This is what it looks like all painted!  Ignore the "stuff" on top of the cabinets, it will be decluttered and restyled soon enough.


 It actually looks more blue in some of the pictures than it really is. Why don't wall colors ever photograph reality? Perhaps it's my mad photography skills....

There are few other updates we're looking to make in this space including new hardware, a new countertop, refinishing the cabinets and new flooring.  This area and our laundry room are the hot spots for renovation this year and I will share the (slow) progress.

I'm totally loving the open airy feeling!

Thursday, January 3, 2013

2013 Goals

Wow, it has been over a year since I've posted anything.  That's terrible.  I didn't get ran over or take shelter for the end of the world, I simply got over indulged in my life (work, kids, home projects, etc).  Well this year one of my goals is post a little more frequently, it will still be sporadic as my day job has it's ebbs and flows, but at least more than once a year.  I have a few projects I want to share with you soon, there seems to have been a good amount of additions (furniture wise) and changes around here.

With the new year, everyone sets goals or resolutions, so here goes mine, in no particular order.

  • Organize electronic cords, memory sticks, etc
  • Organize photos
  • Create Blurb books from 2007 to 2012
  • Kitchen updates (I will have a whole post on what this entails)
  • New mudroom/laundry/pantry addition (separate post with details)
  • Updates to the boys' rooms
  • Add molding to the toy room
  • Incorporate a regular fitness routine into my schedule
  • Work on having a better morning routine
  • Update the boys' bathroom
Those are the biggies for now, I'm sure more will get added as the year goes on.  There are a lot of little organizing projects I'm planning once the supplies go on sale at the Container Store.

What's on your list this year?  Do you have any major home renovations in the works?

Monday, December 12, 2011

Countdown to Christmas

Only 13 days and counting until Santa brings a sleigh full of goodies!  Every year I have great intentions of having all of my holiday shopping finished by the first of December, but I usually have 1 or 2 that I'm scrambling to finish the week before Christmas.  I've seen tons of organizing ideas on Pinterest and in blog land that I WILL do next year.

Anyway, on to the real purpose of my post today.  I am so excited about it!  I have been searching for a nice advent or Christmas countdown for awhile.  We are so busy this time of year travelling since our family lives so far away, the reality of getting to do a daily activity are grand, but not practical.  We do the Christmas tradition (2 years now) of reading a Christmas book every night beginning December 1. 

With my kids being 1 and 4, I get the constant question of "When does Santa come?".  So using the powers of Pinterest, I found this really cool countdown and decided to put my own spin on it.

Love this Christmas countdown
{Source}
Unfortunately, I didn't get any in process pictures.  I was just trying to get it done and see if it would turn out anywhere close to what I had in my head. :)
I am very lucky to have a stockpile of old barn wood from my great grandmother's.  So I began with a small piece.  Then I cut the words in vinyl with my Silhoutte and put them directly on the wood.  I was going for an old, worn look.  Then just painted over the words.

Once dry, I removed the words and rubbed Valspar Antiquing Glaze over the entire piece and sanded to further enhance the old, worn look.

For the numbers, I looked everywhere for inexpensive metal numbers like my inspiration piece, but didn't have any luck, so I found a package of numbers used for mailboxes at Wal-Mart for $7.  Of course, the stark white numbers didn't work for me, so I rubbed the Antiquing Glaze over them and added some glitter.
To make the countdown easy for daily updates, I just attached some eye hooks to the back and tied jute to the numbers.  I did add some small washers I had laying around to keep the strings from being pulled through the eye hook.

All done and I absolutely LOVE it!  A holiday countdown for years to come.

Wednesday, October 26, 2011

Halloween Wreath

Well HELLLLOOOOO!  It has been a very long time since my last post and I apologize, life just sometimes gets in the way of hobbies.  I'm back today to show you my Halloween wreath.  I found the idea of a year round wreath here.  So far I've made one for Easter/Spring, 4th of July, Summer, Late Summer/Early Fall, and Halloween.  I'll try to do better to show you the others next year during their corresponding holiday.  I'm also going to be working on a Thanksgiving/Fall and Christmas wreath over the next couple of weeks.  It's been a lot of fun because D has been my handy dandy helper!


You can use any fabric.  I will either order a fat quarter of the fabric collection I like from The Little Fabric Shop or pick up a package from JoAnn's.  I picked up this Halloween fabric from JoAnn's and I've got plenty left to make some for friends and family (as I have time!).

                                     
For the bow, I used some glittery orange tulle and black tulle I picked up from Hobby Lobby last year.

I highly recommend checking out the tutorial.  It's been a lot of fun making these and changing them out with the holidays.  As an extra bonus, the removable pieces are MUCH easier to store than a full wreath!

Have a great Halloween!

Monday, February 14, 2011

Valentine's Day Art

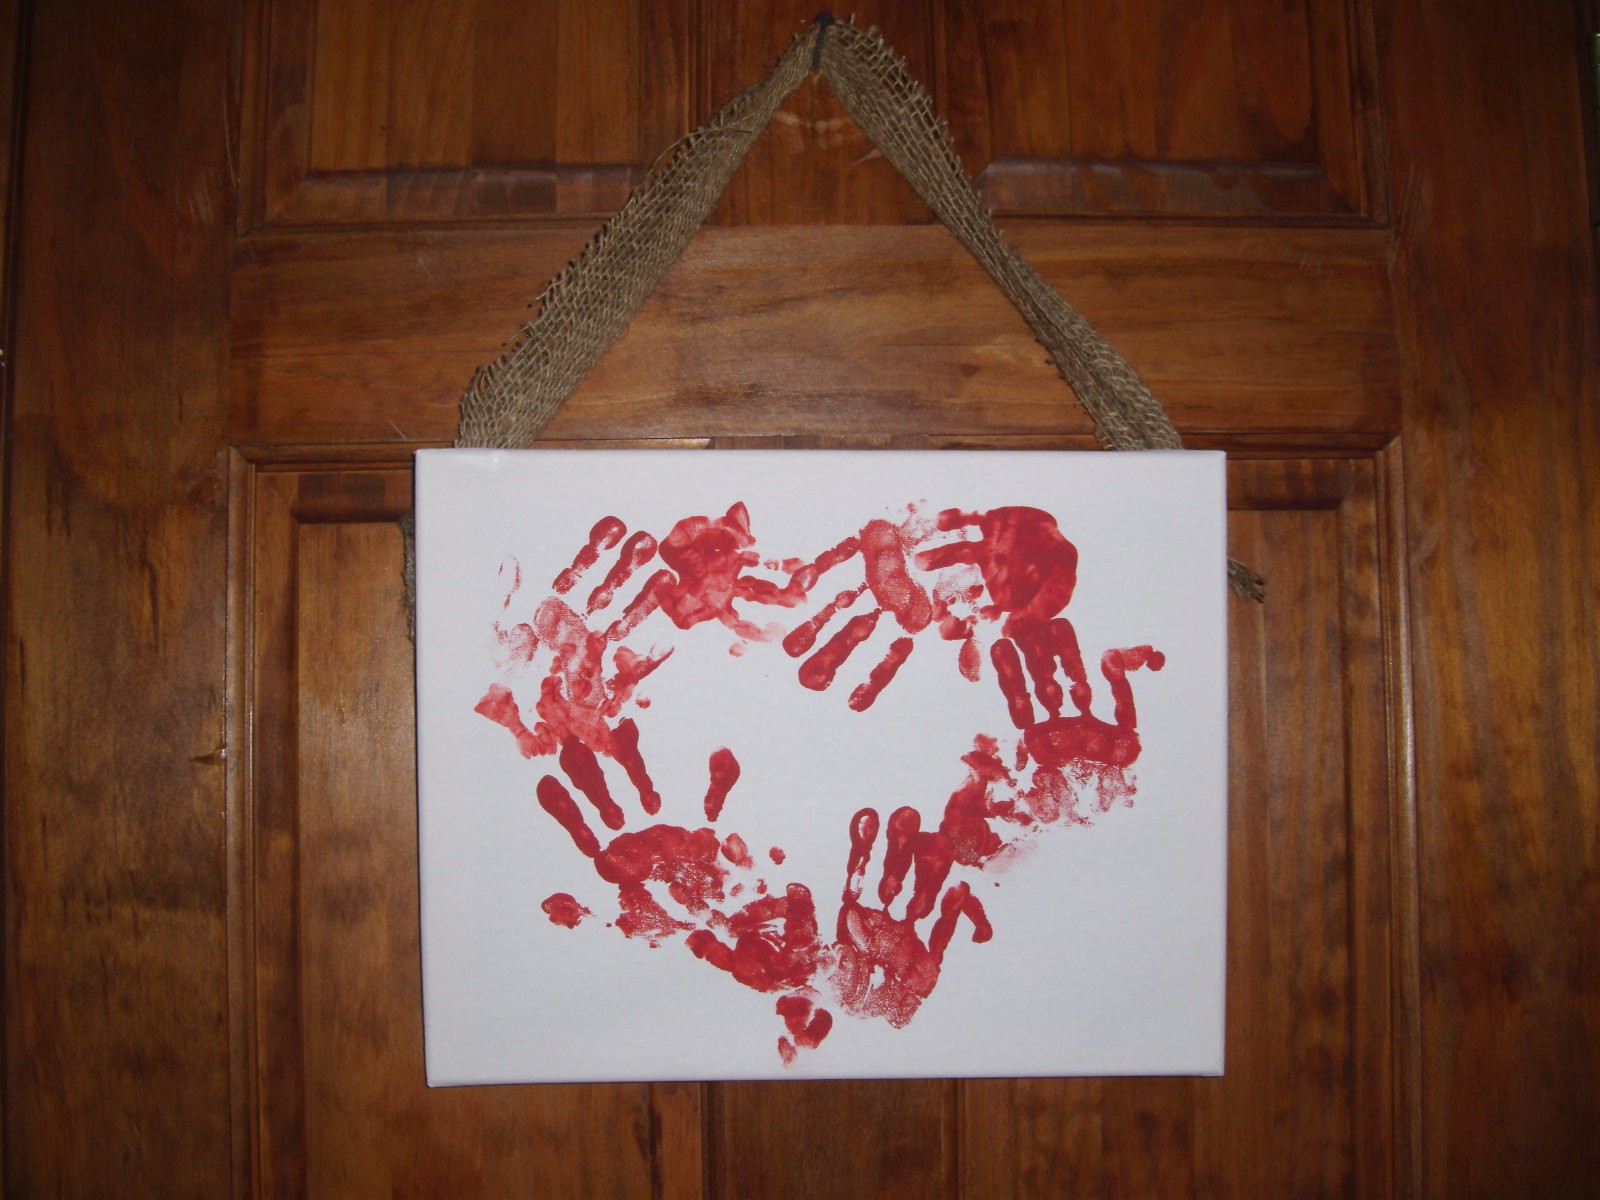
Hello!  Happy Valentine's Day!  I'm just not that into the holiday personally, but any holiday centered around chocolate can't be that bad.  I usually don't decorate for the holiday, but this year to celebrate our first Valentine's as a family of four, I created this little piece of art with the boys a few weeks ago.


It will be fun to watch how much their hands grow over the years and I like having this to mark the first Valentine's Day for T.  I never thought to do this with D, but I have his prints now.

You'll need a canvas, red craft paint, and burlap for the hanger.  Super easy and fun for the little ones!

Hoping your day is filled with candy and love.


Friday, February 4, 2011

Things I Love

The past couple of weeks have been very hectic with work (with no end in sight).  I have been trying VERY hard to keep family time as family time and not more work time, but I honestly haven't stopped to really enjoy my family time.  I'm there physically, but my mind is thinking about everything else I probably should be doing.

Well, this morning kind of changed me.  My baby got up around 6 and I fed him, then put him in his swing while I showered and got ready.  As I was getting ready he just sat there and smiled at me, cooed and blew raspberries.  It was the sweetest, most adorable sounds I have ever heard.  T is a very happy baby, and he's does this every morning and evening, but I haven't stopped and actually relished the moment for several weeks.

Then, making my morning even more incredible, D came running in the bathroom and about knocked me over with his hugs.  Again, this is something he does most mornings, but for whatever reason, this morning I needed to be reminded just how much these 2 little boys love me and that everything will be okay. 


Thursday, February 3, 2011

It's A Wash

I must confess, I've had this laundry room done for about a week, but haven't gotten around to showing you the pictures.

Let's go back to a few weeks ago when the laundry room looked like this:


I was itching to paint and stencil and add a little modern flair to our home that is mostly traditional country.  Sounds a little funny, doesn't it?  Traditional- country.  What is that, you ask?  Well, it's a mish mash of rustic, cabin-y,  and traditional lines and colors.  I do like a lot of straight, clean lines, so you could say it's touch of contemporary, traditional, and country....now if that isn't a contradiction!

Anyway, I wanted this room to be a little different than the rest in our home.  I really despise the size of this room as a laundry room.  It's very difficult to move around in so I wanted to do something that made me like the room a little more....not necessarily "like" doing laundry. :)

So I painted the wall that you see from the kitchen.  I've got 2 of the other walls that you can't really see stenciled, but I haven't painted it yet....I'm going to live with it for a bit and decide if I think it's worth the time to paint the rest.  It's a very time consuming process and I'm afraid I will get tired of the pattern faster than I can paint the entire room.

So here is the after. 

I wanted to add some baskets to help hide some of the visual clutter.  I am thinking about removing the cabinet above the washer and put in open shelving.  I think it will actually provide more storage than what's currently available.  We're trying to save up for some storage for the kids toy room and a really rockin' vacation this summer (we need it), so the shelving is low on the list of priorities.


I made the sign this past weekend.  I found the quote on a sign in Country Sampler magazine, but I didn't really like the style of the sign and it was too expensive for something I could easily recreate.  I used my Silhouette to cut the words out in cardstock, then traced them onto the canvas and painted.  I love the quote, it's so true to my life filled with boys!

I'm linking up with I Heart Organizing.
beforeAndAfterButton